Wednesday, February 24, 2010

More on the retreat


Wanted to post a couple of layouts from the retreat I attending this past weekend and a few helpful hints (I hope). As you have noticed over the past month I have been focusing on our daugther's childhood pictures and using lots of diffrent products. While I am a CTMH consultant and I do love our products and use them often, I like to think of myself as an equal oppertunity spender, I purchase what I love no matter who the manufacture is.

The layouts are of my 2 oldest daughters when they were young, as you can see I really am using the flowers and brads finally.

And here is a picture of Kelli, our youngest daughter in her 4 month's pregnant photo!! Yepee it is gonna be a girl, I will for sure get to use more flowers very soon.

I was able to get 44 layouts done this past weekend, now that may seem like a lot to you but I normally can knock out everything I bring and even play around with the scraps to make a few cards.

Had some bad luck this weekend, by the time I arrived in Atlanta I had become so car sick I wasn't able to hit the crop room, so I had a bite to eat and hit the bed :( Lost a full night of creating. By Saturday morning I was feeling a little better so I spent most of the day cropping but took a few breaks now and then. Sunday I was back to normal but had to get on the road by 2:00 to make sure and get home before dark. I felt sorta bad that I wasn't able to rock with the rest of the ladies like I normally would have but sometimes my health just gets in the way and I have to roll with the punches.

I did take along my Cricut just in case and it worked out great, I sat it up along with my Utt light in the motel room, when I needed a break I would take my layouts up to my room and do the titles and whatever else I thought it needed. I use this example of why you might want to bring along your Cricut even if the retreat will have one on hand. Another thing to think about when bringing along a system such as the Cricut is do you really want to share it with others? Now I will share just about anything with anyone, however that being said if you put the equipment out for all to share you take a chance in it getting broken by someone who hasn't a clue how it works, or you will end up spending all your time showing them how to use it. Again I love to share my tools, supplies and help with everyone but I do still want to get my own layouts done so give a little thought as to where you want the expensive stuff set up.

Since returning home I have been able to finish an additional 20 layouts and have almost completed all my page kits I took along with me, so all is right with the world.

I hope each of you can have the opportunity to attend a retreat this year, there is nothing like spending a weekend with scrappers, they are the kindest, most generous, fun loving ladies you will ever meet, wish I had felt well enough to have enjoyed their company more. So clip those coupons, use your crock pot instead of eating out and pass up the latest sale at Ann Taylor's this year, save up your money ant treat yourself to a retreat!!!

Retreat Time


This post is a week late, UGH. Life seems to keep getting in the way of my play time, does that ever happen to you? So finally here are a few tips for retreat packing. The photo's posted are of what I took to the retreat in Atlanta this past weekend.
First off make sure and get the details from the company hosting the retreat, most company's will provide many die cutting systems as well as the Cricut and an assortment of punch and such.

Don't bother with lugging something along that will already be provided, you may want to bring a few of your favorite die's or Cricut cartridge just in case.

Second, make sure you are clear regarding the meals that will be provided, eating in a hotel or resort can run into some big money, if your room is equipped with a microwave and refrigerator you may want to consider bringing along drinks, snacks and maybe the fixins for a sandwich. I once paid $57.00 for a hamburger, fries, pickle and drink at a scrapbooking retreat. After taking a photo of my very expensive feast you can bet I ate every bite of it then scrapbooked it later!

Pack as lite as you can!!! Do not attempt to bring everything you own just in case, space is limited and your time is precious don't spend it digging around in boxes or cartons. I take page kits as described in the crop post. I normally put together 50 to 75 kits. I know it seems like a lot but whatever I don't use at the retreat I stack on my table at home and I am ready to rock and roll when the mood strikes me. I also bring along extra white, cream and black card stock, they seem to be my go to colors when nothing else works.

Bring along your basic tool kit; you don't need anything fancy, just bring what you use each time you scrapbook for me a corner rounder is basic as well as a ruler.

Other tools; I do usually throw in a border punch or two, but not everything I own in case I want to fancy something up. I also bring my brad/eyelet kit that includes the setter ( will post photo later)

Embellishments; Since I put together page kits I don't drag a lot of embellishments with me, I do however have an assortment of buttons and waxy flax as well as a pretty good supply of flowers right now. This winter I am concentrating on scrapbooks of my girls so I hope to use up lots of flowers that I seem to have been squirreling away over the years.

Stamping; I do take along my stamp tower, it takes up very little space and is easy to transport but I only take along a few basic stamp sets that I might want to use to jazz up a page or two

Extras; I like to take a CTMH how to book to help me along when I get stuck in a rut, the patterns are fast and easy, takes the guess work out of page design, love that. I also bring along my laptop to check out any sites that I might want to scrap lift. I throw in my Utt light along with an extension cord just in case the lighting is bad in the scrap room, many times I end up setting it up in my hotel room to put finishing touches on layouts.

Don't forget your camera and extra batteries!!

Wednesday, February 17, 2010

Cropping on the go


This month is all about organizing but we are gonna step outside our scrap space today to address organizing for a crop or retreat.
If you are not organized when going to a crop or retreat you will be so disappointed, you will find that you spent lots of time and money and have very little to show for the effort you put in. I have been to so many crops and retreats where it takes some ladies 2 hours or more just to load their supplies into the cropping room, they have crates, storage boxes, rolling carts and bags that stack chest high when they are done but they tend to get very little accomplished other than digging around in the mounds of stash they brought with them.

I don't do that!! Here are a few of the reasons
1.) To lazy to do all that packing of supplies
2.) To lazy to drag it from the house to the car, from the car to the crop room them repeat the process all over at the end of the night
3.) To old to remember where I put everything when I was packing up
4.) Did I mention I was lazy?
If you are of a mature age like me your gonna end up throwing your back out lugging all that stuff around, for you younger ladies don't be straining those ovaries, not a good thing to do in your reproductive years .

So here is a quick easy way to pack for day crop, I will get back with you on a retreat tomorrow, but much of the information will be the same. When I head to a day crop I take one rolling tote. That's it nothing more even my wallet and keys will fit in the cart.
I get lots of looks when I sashay into the crop room with my single cart.
I know what they are saying.....
They figure I am a newbee and I will be bugging the snoot out of them with questions. I'm not there to crop but rather to talk. I am not very well endowed in the scrapbooking supplies area.
After a few hours they are singing a different tune when I have whipped out a dozen or more pages and they are still looking for that perfect shade of card stock to go with the pattern paper they think they might want to use.

So here is my Little secret; page kits....
That's it, I make up page kits before I leave home them load them up in some traveling folders to keep them safe, throw them in my cart along with a basic tool kit and I am ready to go.
I LOVE to use CTMH level 1 and level 2 kits, everything is already in a sealed bag and ready to go, they even have photo samples on the back of the stickease to take the guess work out of page design, I decide what photo's I want to use, put them in the bag and I am done.

I also do my own page kits, they take a little more time but not as much as you would think, here are the steps to making your homemade page kits.
1.) Pick the photo's that inspire you from photo albums (look at older post)
2.) Pick a pattern paper
3.) Match up your card stock, keep in mind what you will want for journaling block, mats and titles
4.) Pick out stickers, ribbon, embellishments you will want to use
5.) Jot down page title if one comes to mind on scratch paper, quick before you forget
6.) Stack it all together and use a binder clip to hold it all.
7.) Place all of them in a container that will keep the paper safe.
I know some of you thought binder clips!! Is she crazy? Remember this is just to keep everything together for a day or so, the binder clip won't hurt a thing

This along with a tool kit and a how to book for inspiration will have you whipping out pages like a scrapbooking machine. I know it seems crazy but believe me when I tell you less is more, you will find if you stick to the page kit method you will love it, and being away from home keeps you from digging around in your own stash trying to make a decision therefore wasting time.

I leave the page titles and journaling for when I return home, I use a Cricut for page titles most of the time, no need in lugging that big thing around and I find I journal better when I am in the mood, but I do make sure and have a journaling block on the layouts to use later.

If you are still unsure about my advise then add to your tote a photo album and some cash, if you run out of things to scrap you can always go on a little shopping splurge!!!

Saturday, February 13, 2010

Pattern Paper


Pattern paper has been in the past and still is a problem area for me. I don't have a problem storing or using it, my problem is in how much of it I buy!!! I am better now than I use to be however it seems to multiply before my eyes.

I store pattern paper in a couple of ways; first I sort by color, blues, reds, greens etc. I also sort by themes, school, sports, boy, girl, that sort of thing. I am often ask what is the difference in sorting by themes and the category bags in drawers. The category bags are papers I use maybe once or twice each year so I like to keep them put away and out of the way, the theme pattern paper is something I use pretty often so I keep it out in cropper hoppers. I label the dividers for my pattern paper to make paper selection fast and it also helps me see when I have more than enough of one color of pattern paper, right now pink tones are overflowing, I need to use a bunch up before I even think about purchasing any more.
I also use Cropper Hoppers to store specialty paper, transparencies, shaped paper, velum, scalloped paper and such, for me it is all about keeping it simple and tidy.

Now back to my little room of sin, it has been two days since I have done a layout, I feel the need to create!!

More paper storage


I have been a bad blogger this week, just when I think I will update my blog something comes up to distract me then I forget! So it is back to paper storage today so I can move on to other area's next week.
Along with using category bags in file drawers I store scrapbook kits in Cropper Hoppers on open shelves, I usually have a couple of them full of kits, on days when I don't want to do to much thinking, cutting, designing or embellishing I just grab a kit and go. The one thing that convinced me to start my CTMH business was the level 1 kits, I thought they would be great to help newbee's in scrapbooking gain the confidence they needed to scrapbook without a large investment, I never would have dreamed I would love them myself so much. I can get lots of layouts done in so little time and money.
Another area I have is my card stock; now let me tell you I use more than my fair share of card stock, i am a fairly simple scrapbooker, I don't feel the need to embellish my pages a lot, although I still end up buying the embellishments! And I think a little pattern paper goes a long way, although I still buy more pattern paper than I need. My card stock is sorted by color, I then label the sections so it is easy for me to find just what I need. When I am working with CTMH products the paper kits tell you what card stock coordinates with the paper, love that, if I am using another brand of pattern paper it is still easy to find the perfect match since it is all sorted by color. I buy card stock in bulk, it is the most cost effective way to buy and in the long run it saves me money because I can't seem to go in my local store and buy just a few pieces of card stock, I end up with a buggy full of something, yes I said buggy, my local store has buggies!! Smart store owners, HA

more to come stay tuned

Wednesday, February 10, 2010

Photo Storage box layout


Two posts in one day won't happen often! I had Tyler yesterday. He stayed late and had supper with us, by the time he went home, dishes were done, and toys were cleaned up this Nanny was DONE!!
I did get two pages done during nap time using my photo storage box, I was flipping though my Aunt Lucille and Uncle Fritz section and found a few photo's of the campsite they had on the Ohio river, woohoo let me do a layout.
I used CTMH Back Country level 2 paper along with the Campin Fever stamp set, I have never been much of a stamper but since starting with CTMH I am seeing more and more how versatile and economical stamp sets can be. CTMH also sells stickese to use with paper packs but with the stamp set I can use it over and over again, love that!

Organizing paper


If you are like me and every other scraper I know you have enough paper to wallpaper your home and maybe even a neighbors! We have to be smart and economical when we store our paper, so we have room to buy more and the money to do so!
I organize my paper in a few different ways, one of the ways is using clear zipper bags. My local scrapbook store uses these bags when you make a purchase but CTMH also has a similar bag that paper kits come in that would work just as well.
I use the bags to store what I call my category paper, Easter, Christmas, weddings and such. I store pattern paper, the scraps, embellishments, ribbon the works in the bag then label the top right corner. When I am in the mood to scrapbook Easter photo's all I need to do is grab my Easter bag, get our Easter photo's from the photo storage box (remember they are already sorted and ready to go) and I am ready to have at it. No need to dig around looking for embellishments, stickers or anything else, I like to keep the scraps in the bags to save even more time and money, love to use up a few scraps here and there.

My category bags are stored alphabetically in file drawers by Crop N Style, I limit myself to one bag per category, the exception to this is Christmas, I somehow have bought a bit more than I should have but I will be whittling that down very soon. By keeping it all in one bag I can see that I need to STOP buying and use up what I have!! Some times that works pretty well. HA


Monday, February 8, 2010

Layouts for Photo box


Here are two layouts I was able to get done nice an quick using my photo box.


I have a section for my Aunt and Uncle that both past away last fall, I was finally ready to look back and do a layout of them.


I used CTMH Veranda level 2 paper pack and Veranda Stickease, love this new paper from the spring cattie

More Organizing


I hope you are finding the time to get your photo's in albums to make your scrapbooking time faster, easier and more inspiring.


I wanted to share with you what I use to keep all the bits and pieces together that I may or may not want to use in my scrapbooks. I am sure all of you are like our family, we have lots of memorabilia from our travel, school, sports and the like. I don't always use these things in my scrapbooks but I wanted a place that I could keep it all together so if need be I had it at my fingertips or the kids can just look back and get a laugh out of some past memories.


I purchased these storage containers at my local Staples office supple store a few years back, I will tell you they were a bit expensive but I was willing to pay the price to get just what I wanted.


I use legal size hanging file folders to divide up whatever I was sorting, each of our children and grandchildren have a section, they are then divided into categories, sports (lots), school, trips, special events. I also have folders for various trips we have taken. I love, love love, this system, I no longer have treasures from the past floating around in drawers, boxes, closets and where ever they seemed to land.
I haven't done a layout yet today but as soon as I get things around the house back in order from the weekend I plan on hitting some of my ablums and getting a little more of my paper stash used up, hope to post later today.

Friday, February 5, 2010

Photo albums


While flipping through our daughter Amber's album yesterday I found these pictures of her from one morning when I was trying to get out the door to visit her older sisters school, it reminded me of what a handful Amber was, she never stood still, always scurrying around and into something. This is one of the reasons I love my photo albums, I can quickly flip a few pages and be inspired by something, no need to spend hours of time trying to hunt down pictures to go with a memory I have in mind, they are all at my fingertips. I have done so many layouts over the past month that I have had to take a little time and move pictures around in the albums, I am so excited that a few of the albums are almost empty!! Yepee, now to get the journaling done and get the layouts in their respective scrapbooks

Photo Storage boxes


Along with my photo storage albums I use photo storage boxes, the boxes are cheap as all get out, they run under $3.00 @. I use my storage boxes for event photo's; Christmas, Halloween, Disney trip, anything I have a large amount of photo's of that are related to each other. The boxes come with dividers that make it easy to organize with.
So here is and example of how it works, I have all of our Christmas photo's in one section, when I am in the mood to work on Christmas layouts I can just grab from the box and I have all of our Christmas photo's in one place. I have our Christmas layouts in albums by themselves, I don't feel the need to make layouts for each of our children's scrapbooks, this saves me tons of time and money. Using this system I was able to make a Christmas scrapbook for my husband who is Mr Christmas, a few years ago as a gift that had all of the scrap worthy pictures from our own childhoods along with photo's from the years we have been married (35). Now each year all I need to do is add a few pages from the current Christmas season.
I started a scrapbook for our oldest daughter a couple of years back of her own family Christmas pictures, again each year I give her a few pages to update her album with. I have to get busy this year and create and additional album for our 3rd daughter who married last year and is expecting their first little girl this year.

When you are facing boxes, drawers and bags of old photo's the storage boxes work great, just sort your pictures into categories, use the dividers, then pace yourself to go back and put each section in the order that you want to scrapbook whether that is chronological or whatever method works for you.

I am not to hung up on chronological order, for our Christmas scrapbooks I tend to have more of event pages, we make gingerbread houses each year so I have layouts of that; trips to the tree farm, baking cookies, trimming the tree, our special decorations, traditions and such. By scrapbooking this way I was able to showcase many of our family traditions from generations past. I have a layout of Bob's parents putting the angel topper on the tree when he was a baby, we still use the same tree topper so I was able to put current pictures of our own family using the topper, it helps us look back at the past and realize as much as things change they really do stay the same.
I hope all of you are making a dent in you own piles of pictures you are sorting and remember to take a break, stop and scrapbook something that inspires you


Wednesday, February 3, 2010

Using photo albums


One more post for today,

We have 3 daughter's whom we love equally, however buy the amount of photo's we have of them you would wonder....

I am sure I am not alone in this dilemma, daughter # 1 has tons of pictures, every event in her young life was documented well.

Daughter #2 has quite a few pictures, not as many as daughter #1 but still her stack of photo's is not to shabby.

Daughter #3 is outta luck, I do have pictures of her but no where near as many as the other girls and so many of the ones I do have are with her sister's in the picture.

I normally put 2 to 5 pictures on a layout, even more if I convert then to smaller sizes, I can't usually justify having one picture on a layout, heck I have tons of pictures it would take me forever to do that. However to help balance things out a bit I have been using one photo every so often, maybe the girls won't notice as much that the whole who has more scrapbook pages deal is lopsided.

So if you are like me and have multiple children or grandchildren give this little trick a try, do a few one photo layouts of the poor kid who was last in line in the photo ops department.

Photo storage


Have you finished sorting and storing all of your photo's yet? Just kidding I think it took me over a week to get mine done and every once and awhile I will run into a lonely picture in some odd place. With my photo album system in place I now have a home for anything I find.

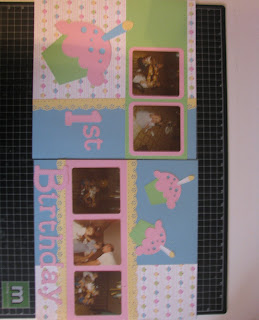
Today's post is an example of how my photo albums work, when I started cleaning up my studio yesterday I ran into the cutiest cupcake paper ever, I have no idea when or where I got it but thankfully I still liked it! Rather than stick it back in the Cropper Hopper I grabbed one of my photo albums and began flipping through it to see how I could use the paper, it didn't take me long to find the perfect pictures of our oldest Daughters 1st Birthday. Heather will be 33 this September so it is high time I got this layout done!

Yepee, I have one less piece of pattern paper in my room and 2 more pages for Heathers scrapbook done. However I never did get around to cleaning up my room so I will give it another try today.

If you can find this book it is a must on organizing your photo's; "Photo Freedom" By Stacey Jillian, she has so may great tips and unique ways to store, scrapbook, and use up the mounds of photo's we all have. "Photo Freedom" was published by Simple Scrapbooks so it has become hard to find, keep searching because it is worth the time and money. She also offers a online class at Big Picture scrapbooking using her photo freedom method, I am not much of an on line student but I am sure it is great, Stacey is such a wonderful inspiration on scrapbooking and life in general.

Back to the cleaning, wish me luck!!

Tuesday, February 2, 2010

February, lets get more done


I have received so many e-mails the past month asking how I organize my scrapbooking supplies to get more done, so this month I will concentrate on organizing. First off keep in mind what works for one person may not be the best for another, we all think differently and scrapbook differently so take what I share that works for you and forget the rest!!
First and foremost you need to get your photo's organized, all the supplies and time in the world won't do you a bit of good if you are running around digging in drawers, bags and boxes of photo's. This can be a huge job but in the end you will be so happy you took the time to tackle this biggie
1.) Find a good out of the way place in your home that you have room to spread out and keep the mess out for a few days, you don't want to have to clean up at the end of each day.

2.) Gather up all the photo's in the house, check every drawer, closet, box and bag you can find, put them in your work area.

3.) Time to shop!! Yepee, you will need lots of cheapo regular pocket photo albums, I have a couple for each of our girls, some for family and trips we take. Also pick up a few cheap photo storage boxes with dividers. I bought my photo albums at a discount store on sale for 2/$5.00, the storage boxes were around $2.00 @. You will also need a photo safe pen to jot down dates etc on the back of the photo.

4.) Now comes the sorting, this is a huge job but don't get discouraged it is so worth the time you put into it. I sorted by each of our daughters then chronological when I could remember the dates. I sorted our events into different piles, Christmas, Easter, family trips, etc. Many of our daughters pictures were in magnetic albums I knew I need to get them out of that hostile environment so I worked on them first. If you are taking photo's out of these albums be very careful not to tear them and also don't stack them on top of each other, they may still have some sticky residue on them
5.) place the photo's you most want to work on in the albums, if you have more than one picture of an event go ahead and put them together in one sleeve, you can fit several in each sleeve. Use the storage boxes for events, Christmas tab, Easter tab etc.

6.) give yourself a prize after accomplishing each task, I give myself the time to do a layout from whatever has inspired me during this process, but maybe you need a little chocolate!! Reward yourself you are worth it


92 layouts ready to go


want to see what 92 layouts look like all stacked and done, just waiting for journaling

January wrap up


Wheeeee, the month is over have the final layout posted here of Tyler and his potty training from last spring.

Thanks to all of you for keeping me motivated to keep up the pace this month. I really struggled some days to get even one layout done.

Now for the total of the month.... Drum Roll please...... 92 LAYOUTS!!!!!!

Holy Hannah that is a lot! I had hoped to get 40 maybe even 50 done for the month but never expected to get this far, I will have lots of journaling to get done in the evenings for quite awhile so I can get them all in the correct scrapbooks. My girls have had a ball looking at the pages I finished each week at Sunday dinner, while they don't scrapbook themselves they do appreciate what I do for them.

Due to overwhelming requests I will be sharing a few tips on how I am able to get my scrapbooking done in record time. Will start the organizing posts today so stay tuned.